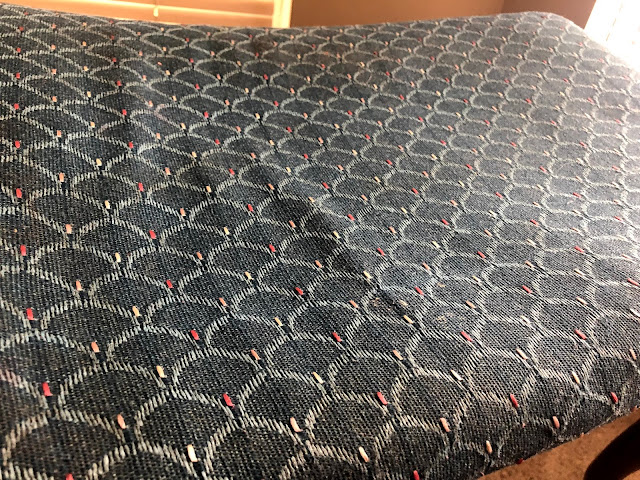
Recovering a Bench Seat | 'Friends' Theme
Recovering a Bench Seat | 'Friends' Theme
I have never messed with recovering old things or cutting old fabric off of anything. But I love how my bench turned out and wanted to share it. I recently redecorated my kitchen to the theme I've wanted to make it for years. I grew up watching and loving the show 'Friends' (like a lot of people do) but I've never had a themed kitchen and have always wanted it to be 'Friends' so I'm super happy about it. I will be sharing that with you soon. This bench is in our dining area right next to the kitchen so it just made sense to make it match with the kitchen.
The before... As you can see it is older so the fabric isn't my style and it is very worn. I wanted to make it my own while bringing the life back into this beautiful bench.
I used (1) 16 oz bag of poly-fil, (1) yard of 'Friends' fabric, the square foam that was already on the bench, staple gun with staples, & scissors to cut the fabric.
First the old fabric needs to be taken off completely. Be careful if you are doing a similar bench because the squared foam was handy to have and I could've easily torn it up with my scissors. I then cut all the excess old fabric off as close to the bottom as possible so none of it was showing. It looks worse before it gets better. Then I started adding poly-fil in between the board and the squared foam to make a sandwich. In the end this makes it have more life to it plus an added comfort level. I even stapled some of the foam to the board to keep it in place better. After putting the foam back on top it was time to put the new fabric on. You want to place it the way you want the fabric to lay so if you have a design keep that in mind.
I started at the side with the table and worked on "tucking" it in the crack between the two. This area was hard to staple, but I just had to hold the staple gun at an awkward angle. I then started on one of the long sides stapling along the under part as I went. Once I got to the end I stuffed it with more poly-fil through the open end making sure it was stuffed well. Then I moved to the other long side versus stapling the end shut. I did the same process of stapling the fabric to the underside until I got to the end. I added more poly-fil to fill that side out good.
This is where you want to add all the poly-fil you will need to level it out. It's pretty self explanatory with that. I cut off the excess fabric on the sides as close to the staples as I could. Then you can kind of see how I tucked the fabric around the corners to staple it. I stuffed with poly-fil in that corner and stapled the rest of the end. I ended using the last of the poly-fil bag on the last corner before tucking and stapling it as well. After cutting off any excess fabric, it is done!
I'm pretty impressed with the before and after and very happy with it. There are minor mistakes and obviously this isn't the correct way to do this, but being my first go I took the easy way.
Frame is from Amazon and the print is from WatercolorWall on Etsy.
Did you miss these blogs?
I also have a Lifestyle channel on YouTube! Have you checked out my most recent upload?
Socials:
Instagram: @allisonhunt_2
Vlog Channel: All The Things w/ AllyBrianne
Beauty Instagram: @allybrianne_mua
Beauty Youtube: AllyBrianne
Beauty Blog: Beauty With AllyBrianne
Beauty Podcast Instagram: @withasideofbeauty
Beauty Podcast: Maxx & Ally With a Side of Beauty
True Crime Instagram: @caffeinecrimepodcast
True Crime Podcast: Caffeine & Crime
True Crime Blog: Caffeine & Crime
This blog is not sponsored.
Thanks for supporting my Blog & Channel! XO


Comments
Post a Comment